Norfolk Island Pine Araucaria heterophylla
Norfolk Island Pine Care: The Complete Guide
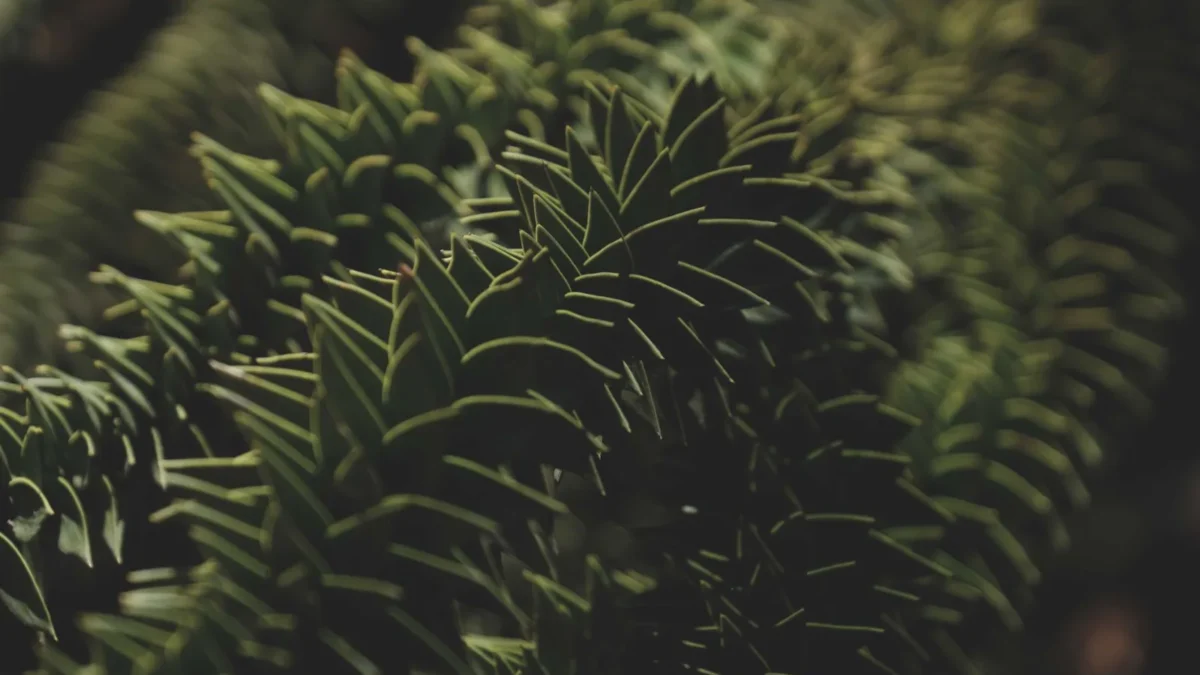
The Norfolk Island Pine is a slow-growing, elegant houseplant that brings tropical style to any home with its symmetrical, layered foliage. This guide covers everything you need to know to grow a healthy Norfolk Island Pine indoors, from light and watering to preventing browning and saving a struggling plant.
Norfolk Island Pine at a glance
| Botanical name | Araucaria heterophylla |
|---|---|
| Light | Bright indirect light; avoid direct afternoon sun which causes scorching |
| Watering | Water when top 1 inch of soil feels dry; every 5-7 days spring/summer, 7-10 days fall/winter |
| Humidity | 50-70% humidity; low humidity causes browning tips |
| Temperature | Daytime 65-75°F; nighttime 55-65°F; keep above 50°F |
| Soil | Fertile, porous, sandy, peaty, slightly acidic, well-drained soil |
| Feeding | Weekly or biweekly dilute liquid fertilizer spring through fall |
| Size | Slow-growing; reaches 6+ feet tall indoors over years |
| Difficulty | easy |
| Cats | ✓ non-toxic |
| Dogs | ✓ non-toxic |
Key points
- Place your Norfolk Island Pine in bright indirect light; avoid direct afternoon sun which causes leaf scorching
- Water when the top inch of soil feels dry—every 5–7 days in spring/summer, 7–10 days in fall/winter
- Maintain 50–70% humidity to prevent browning tips; low humidity is the most common cause of decline
- Keep daytime temperatures between 65–75°F and nighttime temperatures around 55–65°F; never let the plant drop below 50°F
- Feed with dilute liquid fertilizer weekly or biweekly from spring through fall
- The plant is non-toxic to both cats and dogs
Light Requirements for Norfolk Island Pines
Your Norfolk Island Pine needs the brightest indirect light you can provide in your home. Position it in an open, bright location, but not in full sun. This means a spot that receives plenty of ambient brightness all day long, but where the sun’s rays never directly hit the foliage for more than a brief period, especially the harsh afternoon sun.
Why indirect light matters
Direct sun, particularly through a west-facing window in summer, can scorch the needles, causing ugly brown or yellow patches. However, some light afternoon shade may be needed to avoid possible foliage bleach—those yellowed or faded tints that appear with too much intensity. Full sun does normally encourage compact, symmetrical growth, but the risk of damage usually outweighs the benefit indoors.
Low light creates the opposite problem: the tree will become leggy, with sparse, droopy branches and wide gaps between its tiers. If your home is naturally dim, consider supplementing with either fluorescent or incandescent light sources.
Ideal spots include a few feet back from a bright north or east-facing window, or a position near a south or west-facing window where a sheer curtain filters the direct rays.
Watering Your Norfolk Island Pine Correctly
Proper watering is critical for Norfolk Island Pine care indoors. Water when the top one inch of soil feels dry to the touch. In most homes, this means watering every 5 to 7 days during spring and summer, and every 7 to 10 days during fall and winter. The exact frequency depends on your growing environment—temperature, humidity, pot size, and season all play a role.
Pot size and watering frequency
Smaller pots (2.5 to 5 inches) may need more frequent watering—every 3 to 5 days—especially in warmer, drier rooms. Larger pots retain moisture longer, so you’ll water less often.
Avoiding overwatering
Keep the soil moist, but not wet. Too much moisture may cause roots to rot, especially at lower nighttime temperatures. Root rot from overwatering is the second most common cause of Norfolk Island Pine decline after low humidity, and it manifests as brown, wilted leaves. If you’re unsure whether to water, wait another day—this plant is more forgiving of slight underwatering than of waterlogged soil.
Humidity and Temperature Needs
Norfolk Island Pines prefer a relatively high humidity, typically between 50–70%. Low humidity is the leading cause of browning tips and leaf drop. If your home is dry, especially during winter months, the lack of humidity will cause the leaves to brown and dry out.
Raising humidity
Simple methods include misting the foliage regularly, placing the pot on a pebble tray filled with water (so the pot sits above the waterline), grouping it with other plants, or running a humidifier nearby. Even in dry climates or homes with heating, these techniques can help maintain the 50–70% range your plant prefers.
Temperature range
Norfolk Pines prefer daytime temperatures between 65–75°F (18–24°C) and nighttime temperatures around 55–65°F (13–18°C). These conifers prefer temperatures above 50°F and can be killed by temperatures 35°F or lower. When exposed to temperatures approaching freezing, brown leaves can appear. Keep the plant away from cold drafts, heating vents, and air conditioning units that create temperature swings.
Soil and Repotting Guidelines
Use fertile, porous, sandy, peaty, slightly acidic, well-drained soil. A general-purpose potting mix amended with peat moss or coco coir, plus perlite or coarse sand for drainage, works well. Avoid heavy garden soil or mixes that retain too much moisture.
Norfolk Island Pine grows slowly and does not need frequent repotting. Every 2 to 3 years in spring is the appropriate rhythm for most indoor specimens. When you do repot, use a container only slightly larger than the current one—oversizing the pot leads to excess soil that stays too wet and can cause root rot.
Feeding and Fertilizing
Consider weekly or biweekly applications of dilute liquid fertilizer from spring through fall. Use half the strength recommended on the bottle to avoid salt buildup, which can damage roots. Stop feeding in late fall and winter when growth slows naturally. This feeding schedule supports healthy foliage and steady growth without pushing the plant too hard.
Pruning and Shaping
Norfolk Island Pines require minimal pruning because their natural form is already attractive and symmetrical. Remove any dead, diseased, or damaged branches as soon as you notice them. You can also trim lower branches that have lost their needles to maintain a neat appearance.
Important: Only a tip cutting from the very top of Norfolk Island Pine plants will develop into a completely symmetrical specimen. Once you take that cutting, your Norfolk pine will no longer grow from the top and will lose its attractive symmetrical shape. For this reason, most growers avoid cutting the main leader (the top growing point) unless absolutely necessary.
Propagation Methods
True Norfolk Island pine propagation is reliably achieved only from fresh, viable seeds—and even then, success demands precise environmental control. Stem cuttings do not produce true-to-type, structurally sound plants; they rarely root, and when they do, they develop weak, unstable growth prone to collapse.
Growing from seed
Seed germination is the only home method that produces a properly shaped Norfolk Island Pine, and seedlings reach a foot tall in 12 to 18 months. If you want to try growing from seed:
- Use fresh, viable seeds (older seeds have poor germination rates)
- Maintain a temperature of 75–85°F during germination
- Expect germination to take 2–4 weeks
- Within 10 to 21 days, your seeds should sprout
- Provide bright, indirect light and keep the soil consistently moist (not soggy) until seedlings emerge
- Once sprouted, ensure good air circulation to prevent damping-off fungus
Growing from seed requires patience and careful attention to temperature and moisture, but it’s the most reliable way to get a well-shaped plant.
Common Problems and Solutions
Browning tips
Browning tips are usually caused by low humidity or underwatering. Increasing humidity around the plant and adjusting your watering schedule often solves the problem. Mist the foliage, use a pebble tray, or run a humidifier to bring humidity back into the 50–70% range. Check that you’re watering when the top inch of soil is dry, not waiting until the soil is bone-dry.
Brown or scorched leaves
Too much direct sun can cause brown leaves. Move the plant back from the window or filter direct afternoon rays with a sheer curtain. If the browning is on the newest growth or leaf edges, it’s often a sign of light scorch rather than a watering issue.
Browning at the bottom of the plant
Browning at the bottom of your Norfolk pine may be because of underwatering, low humidity in the air, or a lack of bright sunlight. These trees love a bit of moisture, so when the air around them gets too dry or they don’t get enough water, the lower needles often show signs of stress and start to brown or drop. Check all three factors: water frequency, humidity level, and light quality.
Dry and brown branches
These plants require adequate watering on a regular basis. If they get dehydrated, the lower branches will die. Be sure to water whenever the top soil is dry, but avoid overwatering, too. If entire branches are brown and dry, they won’t recover—prune them off at the base.
Wilted, brown leaves and root rot
Overwatering and poor drainage lead to root rot, the second most common cause of decline. If you suspect root rot, remove the plant from its pot and inspect the roots. Healthy roots are white or light tan and firm; rotted roots are dark brown, mushy, and foul-smelling. Trim away soft roots with clean scissors, repot into fresh soil, and adjust your watering schedule to let the top inch of soil dry between waterings.
Cold damage
Exposure to temperatures below 50°F can cause brown leaves and overall decline. Move the plant to a warmer location, away from drafts and cold windows, especially at night.
Leggy growth
Sparse growth with wide gaps between branch tiers signals insufficient light. Move the plant closer to a bright window or supplement with grow lights. It may take several months to see improvement, but new growth should be fuller and more compact once light conditions improve.
FAQ
Is Norfolk Island Pine toxic to pets?
Norfolk Island Pine is non-toxic to both dogs and cats. However, be advised that the consumption of any plant material may cause vomiting and gastrointestinal upset for dogs and cats. Keep the plant out of reach of pets that are prone to chewing foliage.
How tall does a Norfolk Island Pine grow indoors?
A relatively slow-growing plant, Norfolk Island pine can reach 6 feet tall (or more) over the course of years if it receives good care indoors. Growth depends on light, humidity, temperature, and feeding—plants in ideal conditions grow faster than those in less-than-ideal spots.
Can I propagate Norfolk Island Pine from cuttings?
Stem cuttings do not produce true-to-type, structurally sound plants; they rarely root, and when they do, they develop weak, unstable growth prone to collapse. Seeds are the only reliable propagation method for home growers, though they require precise temperature control (75–85°F) and patience.
How often should I repot my Norfolk Island Pine?
Every 2 to 3 years in spring is the appropriate rhythm for most indoor specimens. These plants grow slowly and don’t require frequent repotting. Use a pot only slightly larger than the current one to avoid excess soil that retains too much moisture.
What’s the difference between bright indirect light and full sun?
Bright indirect light means the plant receives plenty of ambient brightness all day long, but the sun’s rays never directly hit the foliage—or only briefly in the morning. Direct afternoon sun through a window (especially west-facing) is too intense and causes brown or yellow scorching on the needles. A spot a few feet back from an east or north window, or filtered by a sheer curtain from a south window, provides bright indirect light.
How do I know if my Norfolk Island Pine is getting enough water?
Water when the top one inch of soil feels dry to the touch. In most homes, this means watering every 5 to 7 days in spring and summer, every 7 to 10 days in fall and winter. If leaves are wilting or drooping and the soil is dry, water immediately. If leaves are wilting but the soil is wet, root rot may be present and you should stop watering until the soil dries out a bit.
More about Norfolk Island Pine
Sources
- Norfolk Island Pine
- Araucaria heterophylla – Plant Finder
- Caring for a Norfolk Island Pine (Araucaria heterophylla)
Photo: Francesco Ungaro / Pexels, Pexels