Spider Plant Chlorophytum comosum
Spider Plant Care: The Complete Guide
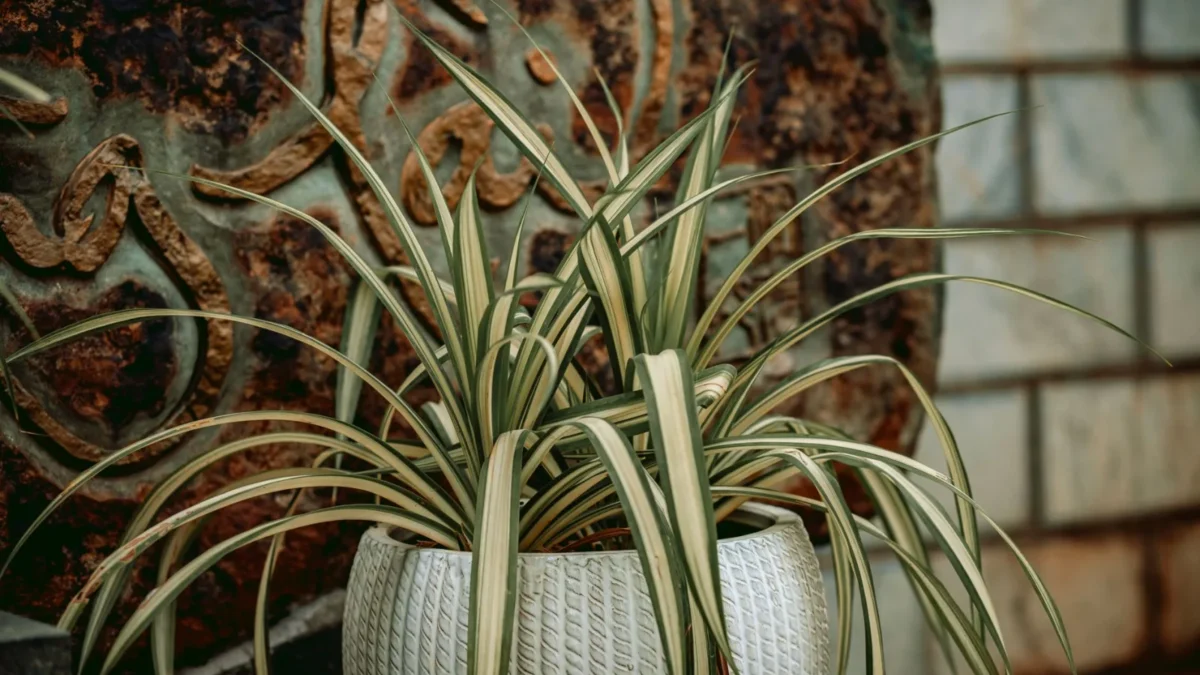
Spider plant care is straightforward once you understand the plant’s basic needs.Chlorophytum comosum belongs to the Asparagaceae family and isone of the most adaptable of houseplants and the easiest to grow, making it perfect for beginners and a reliable choice for any plant lover. This guide covers everything you need to know to grow healthy spider plants indoors, from light and watering to propagation and solving common problems.
| Botanical name | Chlorophytum comosum |
|---|---|
| Light | 6-8 hours bright indirect light daily; avoid direct sunlight |
| Watering | Every 7-14 days; allow top 1-2 inches soil to dry first |
| Humidity | 40-60% relative humidity; prefers moderate to high humidity |
| Temperature | 18-24°C (65-75°F); avoid temperatures below 10°C |
| Soil | 2 parts potting soil + 1 part perlite; well-draining mix |
| Feeding | Balanced liquid fertilizer (10-10-10 or 20-20-20) at half strength every 2 weeks spring-summer |
| Size | 20-60 cm tall; 1-2 feet height and spread |
| Difficulty | easy |
| Cats | ✓ non-toxic |
| Dogs | ✓ non-toxic |
Key points:
– Provide 6-8 hours of bright indirect light daily; avoid direct sunlight to prevent leaf scorch
– Water every 7-14 days, allowing the top 1-2 inches of soil to dry between waterings
– Keep humidity at 40-60% and temperatures between 18-24°C (65-75°F)
– Use well-draining soil (2 parts potting soil + 1 part perlite) to prevent root rot
– Feed with balanced fertilizer at half strength every 2 weeks during spring and summer only
– Spider plant babies propagate easily in water or soil and develop roots within 1-2 weeks
– Brown leaf tips are common but preventable with proper watering and humidity
Light Requirements for Spider Plants
Spider plants flourish best when they receive 6 to 8 hours of indirect sunlight daily. Whilespider plants do well if they get at least 4 to 6 hours of bright, indirect light, aiming for the higher range keeps them vibrant and promotes better growth.Native to tropical forests where they grow in the dappled sunlight of the forest floor, they prefer bright, indirect light.
Spider plants are sensitive to direct sunlight, which can scorch their delicate leaves, so it’s best to place them near a window that receives bright, indirect light.While they can tolerate lower light, they prefer bright conditions to maintain their variegated colors and robust growth; direct sun should be avoided, especially in summer, as it can scorch the leaves. If your plant doesn’t get enough light,they may become leggy, grow more slowly, and be difficult to flower.
A bright east or west-facing window usually provides the perfect balance. If you only have south-facing windows, sheer curtains will filter the intense afternoon sun without blocking too much light.
Watering Your Spider Plant
Spider plants typically need watering every 7 to 14 days, depending on light, temperature, and humidity. The exact frequency varies by season and your home’s conditions.Allow the top 1 to 2 inches of soil to dry out before watering again.Spider plants have thick, fleshy, tuberous roots designed to store water like tiny reservoirs; they handle a short drought brilliantly, but they rot quickly if kept constantly wet.
Spider plants prefer slightly dry soil over consistently wet conditions, and overwatering is the most common cause of problems.When watering your spider plant, it is beneficial to thoroughly moisten the soil until water drains through the drainage holes.
Seasonal Watering Patterns
Spider plants usually require more water in the warmer months as the sun dries their soil out and these are the times when the plant is more active, so you can expect to need to water them twice a week.During colder months they may only need to be watered once a week; watering frequency will vary as well depending on the amount of sunlight the spider plant is receiving and how light its environment is.
Signs of Watering Problems
When the soil is too dry, the plant’s leaves look wilted, or the tips of the leaves will start to turn brown; once the leaf tips turn brown, you won’t be able to turn them green again. Wilted leaves are a signal to water, but brown leaf tips often indicate other issues such as humidity or water quality.
Overwatering can bring on root rot in a spider plant, which is fatal if not caught early. If the soil stays soggy and roots begin to rot, the plant will eventually collapse. Always check the soil moisture before watering, and err on the side of underwatering rather than overwatering.
Humidity and Temperature
Humidity for Spider Plants
Spider plants grow best in 40–60% relative humidity, which closely resembles the plant’s native environment and supports healthy leaf development, efficient water regulation, and consistent growth.Spider plants are adaptable to average indoor humidity levels but prefer moderate to high humidity (50-60%); they can tolerate lower humidity but may show signs of stress in very dry conditions.
In environments with low humidity, such as those found in many homes during the winter, spider plants can develop brown leaf tips. If your home is dry, especially during heating season, mist the leaves lightly every few days or place the pot on a pebble tray filled with water. The water beneath the pebbles (which support the pot above the water level) evaporates gradually, raising local humidity without waterlogging the roots.
Temperature Needs
Spider plants prefer a moderate room temperature between 18°C and 24°C (65°F and 75°F).Spider plants can tolerate fluctuations outside of this range, but they are sensitive to extreme cold; temperatures below 50 degrees Fahrenheit (10 degrees Celsius) can cause growth to slow down significantly or even damage the plant.
Avoid placing spider plants near heat sources, air conditioners, or drafts, as these can cause sudden temperature changes that are stressful to the plant; consistency in temperature and humidity is key to keeping your spider plant healthy.
Soil and Repotting Spider Plants
Best Soil Mix
A recommended soil mix is 2 parts quality potting soil + 1 part perlite, which provides good aeration and drainage while retaining enough moisture for the roots.A standard houseplant compost with an extra 20–30% perlite for drainage works well; the fleshy tubers hate compaction, so any mix that drains in seconds and does not stay sodden is fine.
The key is drainage. Spider plants’ tuberous roots rot quickly in dense, soggy soil, so don’t use garden soil or heavy potting mixes meant for succulents or moisture-loving plants.
When and How to Repot
Spider plants have fleshy tuberous roots, so they will need to be divided and repotted before the roots burst your container, especially plastic containers.Repot in spring, going up one pot size (about 2 cm wider in diameter); tease out any tightly circling roots gently with your fingers.
There’s a useful trade-off with pot size:growing slightly tight in their pots will help spider plants produce babies. Rather than moving to a much larger pot, go up gradually (by about 5 cm in diameter) every 1-2 years. This encourages flowering and plantlet production while keeping the plant compact.
Feeding and Fertilizer
Feed your spider plant with a balanced liquid fertilizer (NPK 10-10-10 or 20-20-20) diluted to half strength, applied every 2 weeks during the spring and summer growing season; spider plants are light feeders — more is not better. Alternatively,a balanced liquid houseplant fertiliser at a quarter to half strength once a month from March to September is plenty; skip feeding in winter.
Spider plants are not heavy feeders, but they definitely grow faster and produce more babies if you feed them regularly. However, restraint is important:over-fertilizing causes brown leaf tips (the salt buildup burns the foliage) and can actually reduce baby production.Over-fertilised spider plants produce more brown tips, fewer plantlets, and a salt crust on the soil.
During autumn and winter, when growth naturally slows, stop feeding altogether. The plant is resting and does not need extra nutrients.
Pruning and Maintenance
Spider plants don’t require extensive pruning, but light maintenance keeps them looking neat. Remove dead or yellowing leaves by cutting them off at the base. Dead foliage harbors pests and disease, so it’s worth removing promptly.
If you want to encourage a bushier plant, you can trim the runners (the stems that produce babies), but most people keep them to enjoy the plantlets. Leaving runners on a healthy plant also triggers flowering, which produces the small white star-shaped flowers that eventually develop into babies.
Wipe the leaves occasionally with a soft, damp cloth to remove dust and improve light absorption. This simple task also helps you spot pests or problems early.
Propagating Spider Plant Babies
Spider plant babies are very easy to propagate; simply cut the stem and remove the decent-sized baby, waiting until they’re at least 2-3″ in diameter with root nubs showing at the bottom. You have two reliable methods.
Water Propagation
Detach a plantlet (pup) with at least a few small white root nubs at its base, set the base in 2–3 cm of room-temperature water in a small glass, and wait 5–10 days for roots to grow to 2–4 cm long; pot into standard houseplant mix and water lightly, keeping in bright indirect light for the first month.The roots start as tiny brown nubs on the bottom of the spiderettes and turn whitish as they grow and elongate.
Soil Propagation
Spider plant babies can be propagated in water or soil; for soil propagation, plant the baby directly in moist potting soil, and both methods work well, with roots developing in 1-2 weeks. Simply place the baby into slightly moist soil and keep it in bright indirect light. Roots will establish themselves quickly without the extra step of water propagation.
Both methods succeed equally well—choose whichever is more convenient for you. Water propagation lets you monitor root development, while soil propagation skips the transplanting step.
Common Problems and Solutions
Brown Leaf Tips
Brown leaf tips are the most common spider plant issue and have several causes.Salts and fertilizer cause brown tips; too much fertilizer, or water high in soluble salts, burns the tips.The plant is particularly sensitive to fluoridated water, according to UF/IFAS, which recommends rainwater or distilled water.Letting tap water stand for 24 hours before use, as SDSU Extension suggests, lets the chlorine escape.Low humidity, as in a heated room in winter, causes dry air brown tips.Spider plants are exceptionally sensitive to fluoride and chloramines found in municipal water supplies; these chemicals travel through the roots and accumulate at the extremities of the foliage, causing severe osmotic stress.
If the tips of the spider plant begin to brown, back off the amount of fertilizer by half of the manufacturer’s recommended amount.Water with rainwater or distilled water if your tap water is fluoridated, feed less, and water before the pot dries out completely; trim the brown ends with clean scissors, because they will not turn green again.If you notice white crust on the soil surface, flush the pot with plenty of water to leach out excess salts.
Root Rot
Root rot develops when the soil stays wet for too long. Prevent it by allowing the top 1-2 inches of soil to dry before watering and using a well-draining soil mix. If you suspect root rot, remove the plant from its pot, inspect the roots (healthy roots are firm and light-colored; rotted roots are soft and dark), and repot into fresh, dry soil. Trim away any visibly rotten roots before repotting.
Leggy Growth and Reduced Flowering
If your spider plant becomes sparse, tall, or doesn’t flower, it likely isn’t getting enough light. Move it closer to a bright window.Blooms occur in response to short days and long, uninterrupted nights for at least three weeks, so spider plants flower more readily in autumn and winter when daylight is shorter.
Poor Baby Production
If your mature spider plant isn’t producing runners and babies, check three things: light (it needs at least 6-8 hours of bright indirect light), pot size (it should be slightly pot-bound), and feeding (consistent but light feeding in spring and summer promotes babies).Spider plants make the most babies when they are slightly pot-bound.Heavy feeding cuts the number of babies.The variety of the plant matters for baby production; Variegatum tends to make fewer babies than other types.
FAQ
Is Spider Plant Toxic to Cats and Dogs?
Spider plant is non-toxic to dogs and non-toxic to cats according to the ASPCA.The ASPCA’s own entry for this plant says nothing about a hallucinogenic effect, records no toxic principle, and lists no clinical signs. However,while cats are often attracted to spider plants and may chew on them — this might cause mild GI upset from the plant fiber, there’s no toxicity concern.Pets that chew a lot of plants may experience stomach upset or vomiting.
How Big Do Spider Plants Get?
Chlorophytum comosum grows to between 20 and 60 centimetres tall, withtypical growth of 1.00 to 2.00 feet in height and spread. The exact size depends on conditions and pot size; plants in larger pots with good light grow larger and produce more runners.
What’s the Best Water for Spider Plants?
Rainwater or distilled water is ideal, as spider plants are sensitive to fluoride and chloramines in tap water. If using tap water, let it sit at room temperature for 24 hours before watering to allow chlorine to escape. This simple step reduces brown leaf tips significantly.
How Often Should I Fertilize My Spider Plant?
Feed every 2 weeks at half strength during spring and summer (March to September), or once a month at quarter to half strength. Skip feeding entirely in autumn and winter. Remember that spider plants are light feeders; over-feeding causes more problems than underfeeding.
Can Spider Plants Live in Low Light?
Spider plants can tolerate low light, but they won’t perform well. In insufficient light, they become leggy, grow slowly, and rarely flower or produce babies. Aim for at least 6-8 hours of bright indirect light daily for best results.
Why Are My Spider Plant Leaves Turning Yellow?
Yellow leaves usually indicate overwatering or poor drainage. Check that your soil drains quickly and that you’re allowing it to dry between waterings. If the pot lacks drainage holes, repot immediately into a pot with good drainage. Old leaves naturally yellow and die back—this is normal, but widespread yellowing signals a watering problem.