Bird's Nest Fern Asplenium nidus
Bird’s Nest Fern Care: The Complete Guide
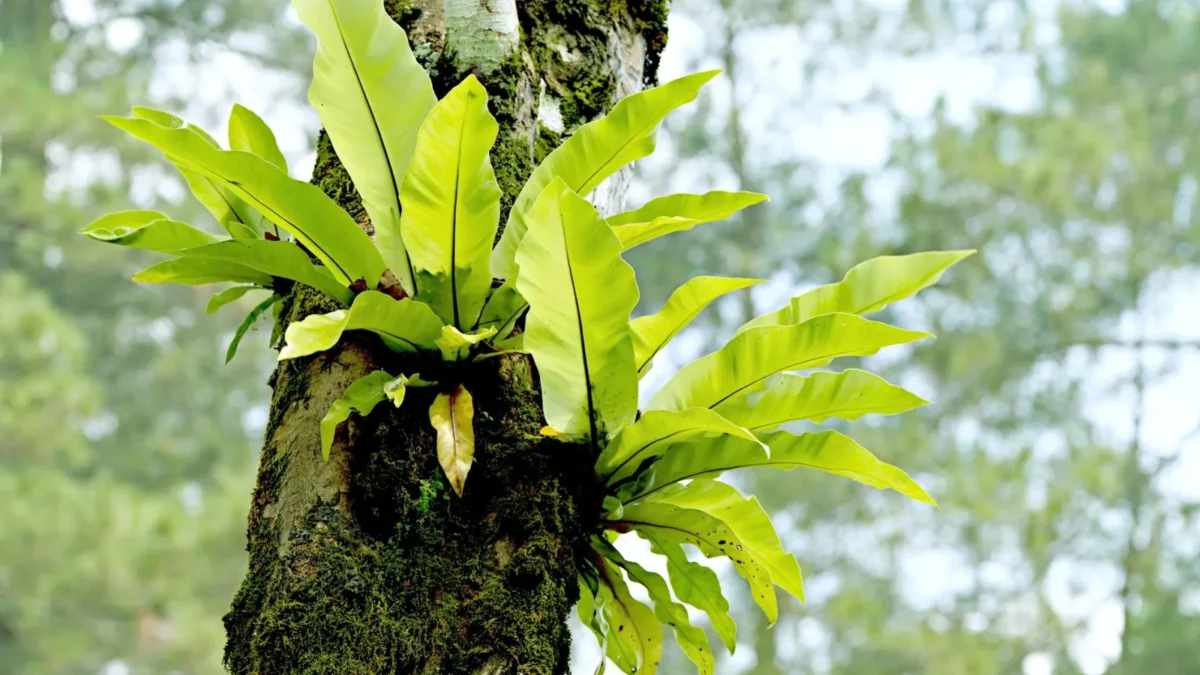
Bird’s Nest Ferns (Asplenium nidus) are among the easiest ferns to grow indoors and tolerate lower light better than almost any other common fern, making them ideal for bathrooms and darker rooms. This guide covers everything you need to know about bird’s nest fern care, from the right watering schedule to creating the humid conditions these plants love.
| Botanical name | Asplenium nidus |
|---|---|
| Light | Medium to bright indirect light; tolerates lower light; avoid direct sun |
| Watering | Water when top 1-2 inches soil dry; keep moderately moist; never soggy |
| Humidity | High humidity needed; mist regularly; place on damp gravel tray |
| Temperature | 60-70°F ideal; minimum 55°F (above 16°C) |
| Soil | Peat-free multipurpose compost, John Innes No.3, horticultural grit; well-draining, slightly acidic |
| Feeding | Half-strength liquid fertilizer monthly May-August; stop during slow growth |
| Size | 1-2 feet tall and wide indoors; fronds reach 18-24 inches on healthy specimens |
| Difficulty | easy |
Key points
- Water when the top 1–2 inches of soil feel dry; keep soil moderately moist but never soggy
- Provide medium to bright indirect light; the plant tolerates lower light but avoid direct sun
- High humidity is essential; mist regularly and place pots on damp gravel trays
- Keep temperatures between 60–70°F with a minimum of 55°F
- Use peat-free compost mixed with John Innes No.3 and horticultural grit for proper drainage
- Fertilize monthly at half strength from May to August only
Light Requirements for Bird’s Nest Ferns
Bird’s Nest Ferns need medium to bright indirect light to thrive. Position your plant 1–3 meters back from a north or east-facing window, or further back from a brighter south or west-facing window. North-facing windows work particularly well.
The leaves will scorch in direct summer sunlight, becoming pale and papery on the exposed side within hours. If your fern shows signs of sun damage, move it to bright filtered light and use the new growth to judge whether the position is safer.
These ferns tolerate lower light remarkably well, making them excellent for bathrooms and inner rooms, but insufficient light does have consequences. When lighting is too low, new fronds emerge smaller and paler, and the rosette shape opens up. You can supplement with full-spectrum grow lights where natural light is not sufficient.
Watering Your Bird’s Nest Fern
Water your fern when the top 1–2 inches of soil feel dry to the touch. In most homes, this means watering once a week, though frequency depends on your environment. Aim to keep the soil moderately moist at all times—it is fine if the top inch dries out slightly between waters, but do not let the entire mix turn dry before watering.
Always water at the soil level around the base of the plant, avoiding the center of the rosette where new fronds grow. Water directly into the crown can cause rot. Use room temperature water to avoid shocking the roots, and avoid hard, alkaline tap water where possible to maintain the slightly acidic soil conditions these plants prefer.
Overwatering is the most common mistake and causes root rot. When roots are exposed to excess moisture, they decay and turn mushy and black. Yellowing leaves that begin at the lower fronds, combined with a soft or mushy base, signal too much water. To save a plant with root rot, remove it from its pot and trim away black, mushy roots, keeping only healthy, firm ones. Allow the roots to air dry, then repot in fresh, well-draining soil in a pot with drainage holes. Going forward, water only when the top inch of soil feels dry.
Underwatering leads to dry, crispy fronds and yellow leaves. If this happens, increase watering frequency gradually.
Humidity and Temperature Needs
High humidity is essential for healthy Bird’s Nest Ferns. These tropical plants need fairly high humidity, which can be challenging indoors, especially in winter when heating is on. Browning leaves are often a sign of air that is too dry.
To increase humidity, place the pot in a saucer over a tray of damp gravel, or group several plants together—this creates a moist microclimate around the foliage. Mist the leaves regularly as well. A steamy bathroom is often the ideal location for these humidity-lovers.
Keep temperatures steady between 60–70°F, with a minimum of 55°F. These are warm-climate ferns that prefer humidity above 16°C (60°F).
Soil and Repotting Guide
Bird’s Nest Ferns need a free-draining, moisture-retentive compost with a slightly acidic pH. Mix three parts peat-free multipurpose compost with one part peat-free John Innes No.3 and added horticultural grit. This combination provides good aeration and water-holding capacity while preventing waterlogging.
Always use a pot with drainage holes at the bottom to allow excess water to escape. A pot slightly larger than the root ball is best.
Repot your fern every 1–2 years. Signs that repotting is needed include roots growing out of drainage holes, a visibly overcrowded pot, or compacted soil that does not retain water well. Repot in spring when the plant is in active growth.
Feeding and Fertilizer
Bird’s Nest Ferns have modest fertilizer needs and can be damaged more easily than most houseplants if over-fertilized. Use a half-strength general liquid fertilizer once a month from May to August only. During periods of slow growth, stop fertilizing altogether.
Over-fertilizing causes browning and drying that begins at the tips and works back into the rest of the fronds. Always water the plant before applying fertilizer to protect the roots.
Pruning and Maintenance
Bird’s Nest Ferns require minimal pruning. Avoid handling the delicate fronds, as they bruise easily. Do not wipe dust off new fronds emerging from the center at their early stage. Once mature fronds are established, you can gently clean them with a damp cloth to remove dust and help you spot pests early.
Ensure good air circulation around the plant and avoid crowding it with other plants. This helps prevent pests and fungal issues. Remove any completely dead or damaged fronds at their base.
Propagating Bird’s Nest Ferns from Spores
Bird’s Nest Ferns reproduce through spores found on the underside of mature fronds. To collect spores, cut a mature frond from the plant and place it in a brown paper bag; after a few days, the spores will detach and collect in the bag.
Sow the spores onto damp sterilized peat in a covered container and maintain temperatures of 70–80°F. Spores germinate in about 2 weeks under these conditions, but propagation is slow and requires extremely clean conditions to prevent algal contamination. Most home growers find it easier to purchase young plants rather than grow from spores.
Note that these ferns have a single growing point and do not produce offsets, runners, or branching rhizomes. Attempting to divide the plant by cutting through the crown will kill it.
Common Problems and Solutions
Root rot and yellowing leaves from overwatering — Yellowing leaves are the first sign of root rot, often starting with lower fronds and moving upward. Root rot occurs when roots are exposed to prolonged moisture due to overwatering or poor drainage. The base of the plant may feel soft or mushy. To fix this, remove the plant from its pot, trim away black mushy roots using sterilized scissors, and repot in fresh, well-draining soil. Going forward, water only when the top inch of soil feels dry and always use a pot with adequate drainage.
Dry, crispy fronds from underwatering — If fronds become dry and crispy, the plant is not getting enough moisture. Increase watering frequency gradually until the soil remains moderately moist at all times.
Browning leaves from low humidity or direct sun — Browning often indicates air that is too dry, especially in winter when heating runs. Increase humidity by misting regularly, placing the pot on a damp gravel tray, or moving it to a bathroom. Browning can also result from direct sunlight, which scorches the leaves. Move the plant to bright indirect light.
Brown crown from overhead watering — Browning in the center of the rosette indicates water splashing on the foliage or overhead irrigation. Always water at the base of the plant, never in the crown.
Small, pale fronds from insufficient light — Low light causes new fronds to emerge smaller and paler, with slower overall growth. Move the plant closer to a window with bright indirect light, or supplement with full-spectrum grow lights.
Fungal infections from poor air circulation — High humidity combined with poor air circulation can encourage fungal infections. Avoid overhead watering to keep foliage dry, ensure good air circulation, and do not crowd plants together.
FAQ
Is Bird’s Nest Fern safe for cats and dogs?
Yes, Bird’s Nest Fern is completely safe for both cats and dogs. The ASPCA lists it as non-toxic, and it is a popular alternative to genuinely toxic options like asparagus fern. If pets nibble the fronds, they may experience mild digestive upset, but no systemic toxicity is recorded.
How big does a Bird’s Nest Fern grow indoors?
Indoors, Bird’s Nest Ferns typically grow 1–2 feet tall and wide, though individual fronds can reach 18–24 inches on healthy specimens. This long-lived, low-maintenance plant forms a rosette of lush, glossy bright green leaves.
Can Bird’s Nest Ferns survive in low light?
Yes, Bird’s Nest Ferns tolerate lower light better than almost any other common fern, making them excellent for bathrooms and inner rooms. However, very low light causes smaller, paler fronds and slower growth. Bright indirect light produces the healthiest, most attractive plants.
How often should I water my Bird’s Nest Fern?
Water when the top 1–2 inches of soil feel dry, which typically means once a week in most homes. The exact frequency depends on your environment and how quickly your soil dries. Always keep the soil moderately moist but never soggy.
What is the best location for a Bird’s Nest Fern?
A steamy bathroom with bright indirect light is often ideal, as it provides the high humidity and appropriate light these plants need. Alternatively, place the fern near an east or north-facing window, 1–3 meters back, where it receives bright filtered light.
Why are the edges of my Bird’s Nest Fern turning brown?
Brown leaf edges usually indicate low humidity or direct sunlight. Increase humidity by misting regularly and placing the pot on a damp gravel tray. If the fern receives any direct sun, move it further from the window to bright indirect light.
More about Bird's Nest Fern
Sources
- Bird's Nest Fern (Asplenium nidus): Complete Care & ID Guide
- Preventing and Treating Bird's Nest Fern Root Rot: A Gardener's Guide
- Epiphytic ferns / RHS Plant Guide
Photo: hartono subagio / Pexels, Pexels